
You know I am crazy about easy DIY projects (Do It Yourself) and enjoy tinkering with stuff. My folks think I can repair anything and in fact, over the years, I’ve proved it by my restoration skills. It is a habit born from having to be thrifty and get the maximum use out of what we had as we simply couldn’t afford to go buy a new one whenever we wanted. And? There’s a deep sense of satisfaction at having created something.
So imagine my absolute delight when I met Cher of Design by Studio C! For me, it was love at first sight. Here was someone who, in my view, lived the dream. I became a regular at her blog. I am fascinated by her expertise of offering easy to follow, free DIY woodworking plans and some amazingly easy DIY projects. And? She is ever-ready to respond if you have a question. Connect with Cher on Facebook
I love her Pinterest boards and you will too! Follow her on Google Plus and Twitter for regular updates.
Welcome, Cher. I am so happy you’re here today!
♥
How to Make a Rustic Drawer Knob Rack
by Cher

Thank you, Vidya, for inviting me to guest post on your site! I am so excited!
My name is Cher and I run a DIY site, Designs by Studio C, where I feature DIY projects, how-to information, and furniture plans. If you like sawdust in your hair and paint under your fingernails, this is the place for you!
For any questions or requests, I can be contacted at cher {at} designsbystudioc {dot} com!
Today, I have a special, easy DIY project I’ve created for your readers!
How to Make a Rustic Drawer Knob Rack
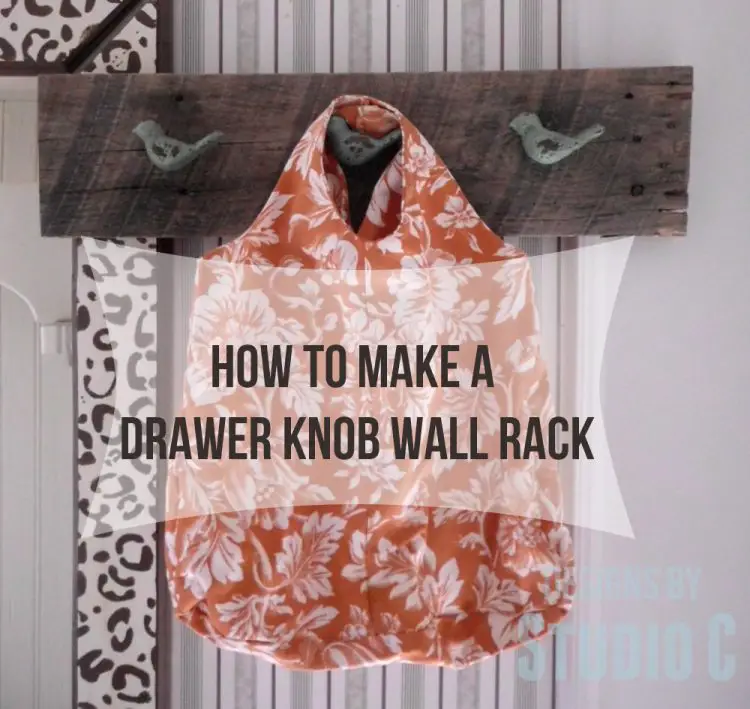
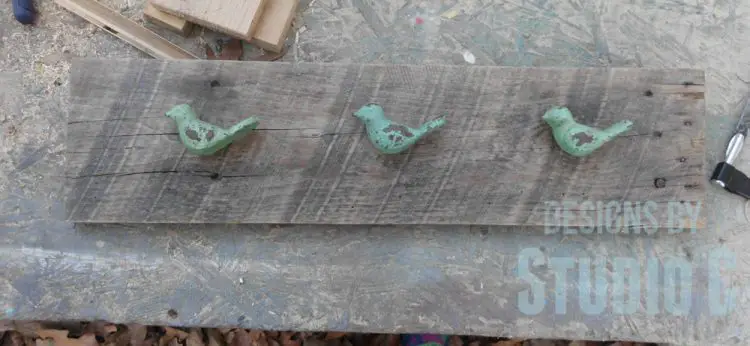
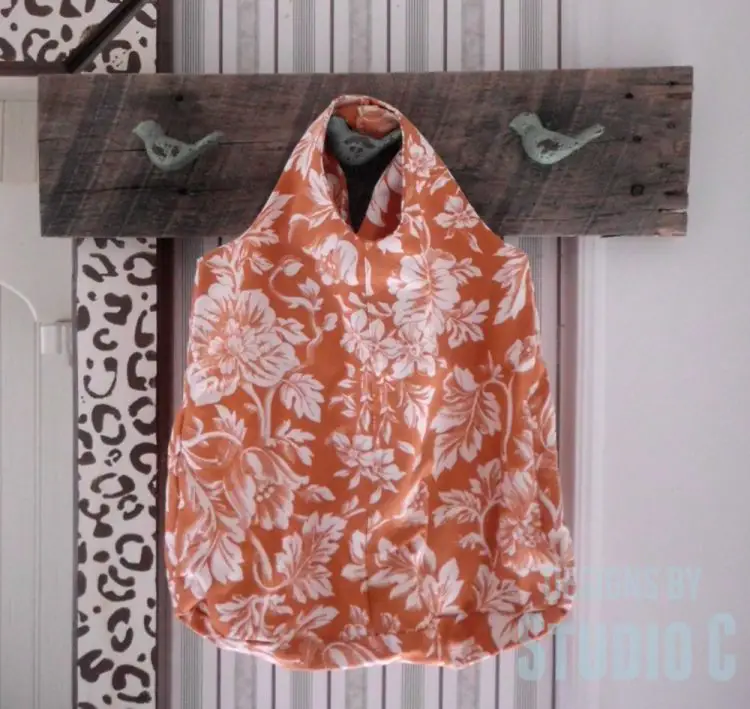
I love these cute little racks! They are perfect for hanging towels in the bathroom, for hanging scarves or jewelry, for organizing pet leashes or shopping bags, or really for whatever you want! They can be coordinated or customized with colors to match your decor, or the wood can be left bare like I did. Drawer pulls are easy to find at any home improvement store or hobby store. These racks can be made in any length and can also be fastened directly to the wall using screws through the wall studs or wall anchors.
Materials:
- 1 – 1×4 board (which actually measures 3/4″ thick x 3-1/2″ wide) measuring approximately 20″ long
- Three drawer knobs or drawer pulls (handles can also be used!)
- Saw to cut the board to length , if needed
- Drill with a 3/16″ drill bit
- Safety glasses and gloves
- Sandpaper (Medium and Fine grits)
- Paint or stain, plus a clear sealer
- Picture frame wire
- Two soda can tabs with two washers and two 3/4″ screws
Notes:
I used a board from an old shipping pallet. I sanded the board then applied a clear sealer. Use caution when pulling the pallets apart – wear safety glasses and gloves!
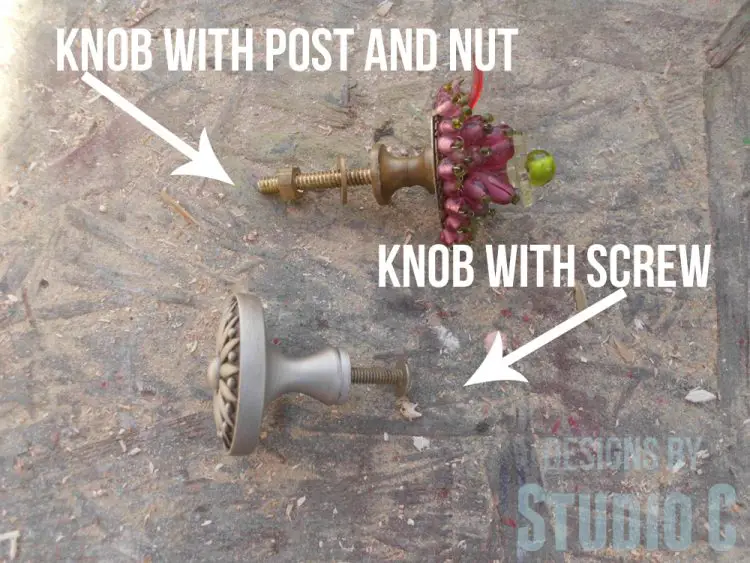
I also used drawer knobs that had a post and a nut on the back, rather than the regular type with a screw that goes into the backside of the knob. I have included instructions for both types of knobs!
Step One
Cut the board to length using the saw. Thoroughly sand the board using the sandpaper. Wipe the dust away, then paint or stain and seal the board.

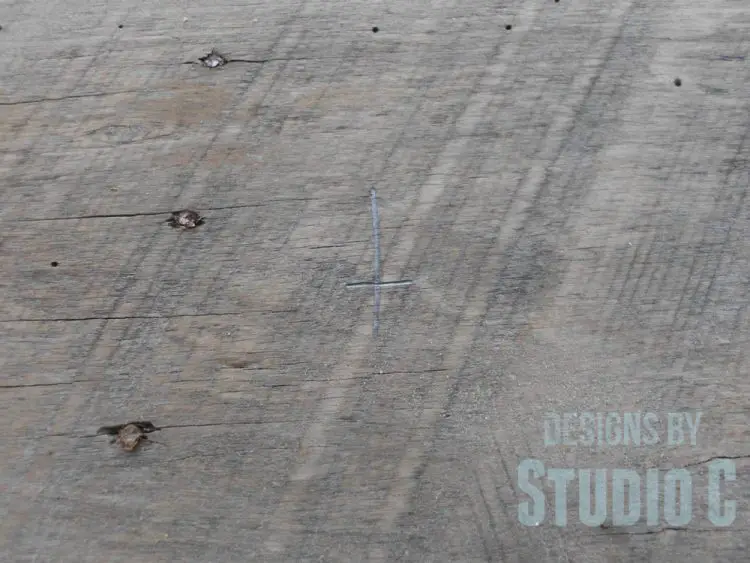
Step Two
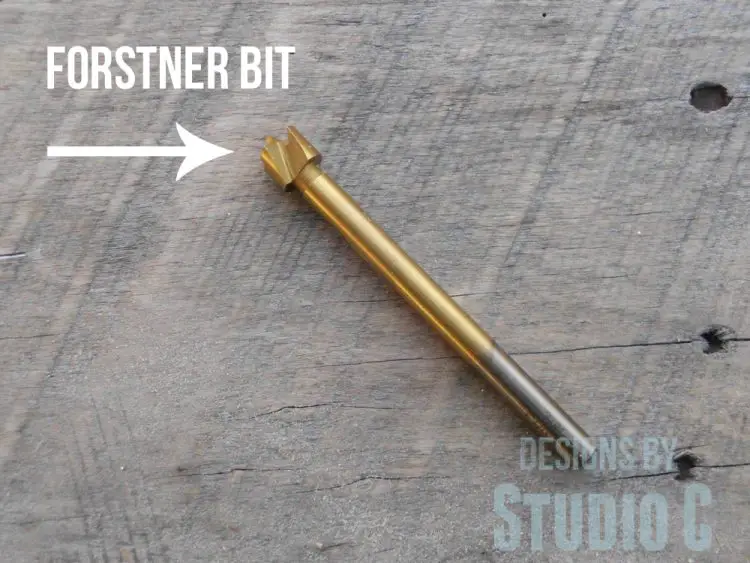
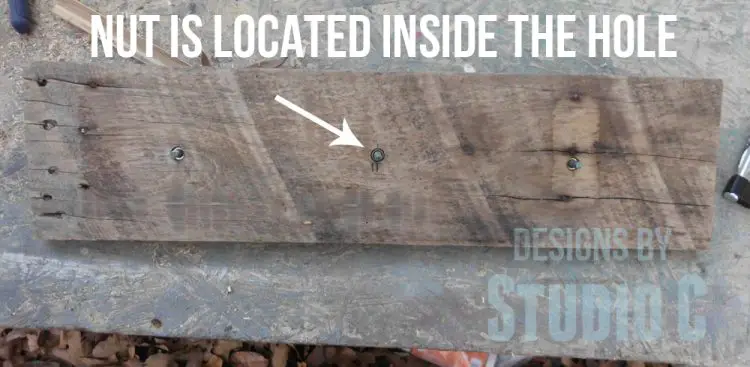
Mark the position of the knobs on the back side. Since the knobs I am using have a nut on the back, I will have to drill a countersunk hole (a hole that will allow the nut to rest below the surface). I used a 3/8″ Forstner bit (a bit that drills flat-bottomed holes) in the back side of the board, then used a 3/16″ drill bit to drill a hole completely through the board for the post.
If a regular drawer knob is being used (one with a screw on the back) use the drill and the 3/16″ bit to drill a hole through the board at each mark.
Step Three
Once I had the holes drilled, I inserted the knob post into the hole on the front side, then put the nut into the hole on the back side and tightened everything down. The post sticks out a bit so I used a hacksaw to cut it off.
If using a regular knob, insert the screw from the drawer knob in the back of the board and secure the knob in place.
Step Four
Mark the position for the picture frame hardware and wire. I measured down 1″ from the top of the board and 2″ in from each edge. I secured the soda can tab (my favorite way to hang frames!) using a screw. Cut the wire at lease 6″ longer than the board, and thread it through the loop in the can tabs. Pull it through the loops so that the wire is in a straight line across the back of the board (it will stretch slightly when hung on the wall) and secure the wire by wrapping it around itself.

Step Five
Hang it on the wall by driving a screw through a wall stud or by using the appropriate wall anchor.
Thank you again, Vidya! I hope your readers enjoy this project!
♥
Thank you, Cher! I am sure they will! I know I do!
Dear Friends,
I urge you to try this easy DIY project! Not only is it easy – the rack is absolutely multipurpose – you can use it anywhere! A few years ago, we had to dismantle a door. We helped ourselves to strips of the wood each time we needed to repair something. Now I have a few strips left and plan to use them for Cher’s project. We never seem to have enough hanging space!
Please check out some of my favorite easy DIY projects on Cher’s blog:
How to make a cork board using an old screen door – fabulous easy DIY project to make a display board
How to make a recycled gift bag – I love this.
How to Build a Corner Bookcase Using an Old Door – Clearly Cher shares my love for recycling doors!
Since I don’t do major sawing / cutting work, I go to my friendly neighborhood hardware store and get the cutting or drilling done. They are usually happy to oblige. Then I bring it all back home and take care of the nailing/nuts and screws/glue-ing to put it together.
Question for you:
What is your favorite easy DIY project?
Please share in the comments!
P.S.
In India, we’re celebrating Republic Day today! Jai Hind! Republic Day honors the date on which the Constitution of India came into force on 26 January 1950
I am linking up with the awesome Unknown Mami who hosts my favorite meme Sundays In My City. She treats me to world travel


That’s a wonderful DIY project. I am such a lousy person when it comes to doing stuff like this…but this one looks easy!
Thanks for bringing this Vidya!
I know you’ll enjoy this, Kajal. And it is fun to make something that you can use right away! Thank you for coming by!
Thank you so much! You could certainly do this and if you need help, please let me know!
This DIY project is interesting, but it is easier said than done!
I’ve already voted for your blog.
It is also easily done, Pro! 😀 I love doing these things!
I really appreciate that you voted for my blog! Thank you so much!
You can do it, I swear!
So simple and yet so elegant, Cher! I’m off to check out your blog.
I can quite see you making one, Vidya. 😉
Hey Corinne. I am totally in love with Cher’s blog. I’ve already hacked her project 😀 and am loving the results! Glad you are here!
Thank you very much, Corinne! I really appreciate it and I am glad Vidya invited me to guest post!
I hope you enjoy the project and if you have any questions, please let me know!
Thank you so much for having me as your guest. I am so humbled by your awesomeness and the kind words!
Love you, Cher! Hugs!
Wow. First of all, this is fabulous. I love the bird knobs. Adore them! Second, thanks for the dip on the forstner bit. I was trying to think of what those types of bits are called. And third, you’re a genius! I never thought of using pop can tabs to affix the picture wire to the back!
Welcome, Dee! I was blown away by the can tabs too. Thanks for stopping by! Cher is a genius!
Just recently I saw another use for soda can tabs here… to double coat hangers Take a look! I thought it was cool!
Thank you so much! I love to use the soda can tabs… They are much cheaper than regular picture hangers!
Thank you so much, Dee! I really appreciate it! When I was little, my grandmother sent me a caterpillar rack with soda can tabs as the hangers. I really love that idea!
We have gotten into the habit of recycling and reinventing many items as well. Great job!
Thanks so much! Thanks for Vidya for the invitation!
That’s awesome, Judy! I like reusing things… It keeps items out of the landfill and it keeps me from spending tons of money!
What a fabulous idea! I need a rack like that and I would never have thought to use drawer pulls but it really looks good.
🙂
Traci
Thank you so much, Traci! They are very easy and inexpensive to make!
🙂 I had a feeling you’ll like it, Traci! 🙂 Do check out Cher’s blog – full of fab DIY!
Hi Vidya,
Good to be here again.
very interesting Guest post, with good number of illustrations. I am sure it’s a great idea. Thanks for introducing Cher here. Have a Good day
Philip
Hi, Philip! Thank you so much! I am glad to know Vidya and that she invited me as a guest…
Thank you for dropping by, Philip! 🙂 Cher is a DIY whiz and I am so happy to have her here! Do visit her blog
Vidya, Thanks for sharing this lovely DIY project, I am not very good at making things but love reading about them and maybe someday I might get the urge to do it. I am bookmarking Cher’s Designs by studio C blog for further viewing.
Thank you, Sulekha! I really appreciate it! I swear, you can do this project and if you need help, I would be happy to walk you through it!
Hi Sulekha! 🙂 This one is easy! In fact, you can get your local carpenter drill the slots for you to bolt-nut the knobs. Easy project, really! Happy you are here.
Carpentry is not one of my strengths. But I like the idea of the recycled gift bag. Will definitely be trying that one.
Hi, Suzy! I love the gift bag, too, and have been known to hoard food boxes! Thank you for the kind words!
Suzy, Cher – I am a food box hoarder and was delighted to see the gift bag tutorial! I also use them to stack books to keep them dust-free. 😀
Thanks for dropping by, Suzy!
That looks so cool!! Great ideas ♥
Thank you so much, Kathy! I appreciate it!
Good to see you, Kathy, always! 😀
Great idea.
I’m DIY person when I need something. I sew, paint, take photos etc. – right now I only take and play with photos.
Hi, BLOGitse! I love being able to do many crafty things, too! Thank you for stopping by Vidya’s site! She’s awesome!
What a fabulous and a simple idea!! Loved it ♥
Thank you so much, Shilpa! I appreciate it!
So cool, no, Shilpa? I love it! 🙂 Thanks for commenting.
Will try these to revamp my kitchen cabinet drawers. Thanks for sharing!!! Wonderfully useful.
Thank you, Michelle! I make quite a few of these because I tend to hoard drawer knobs (amongst other things)!
Michelle, Cher. I once had a door with only knobs all over it. Each time we recycled something, I’d pull out the knob and stick it in the door. Wish I still had it 😀
Would love to see pictures when you make this, Michelle!
Very interesting, a hanger with nice design! Greetings!
Hi, Leovi! Thank you so much! It is a really fun and easy project!
Thank you, Leovi! 🙂
Great ideas and great results.
Thank you, Usha! I really appreciate it!
Thank you, Usha! 🙂
Loving this post! My husband is a builder and specializes in rustic elegance style homes. I love this look and the instructions are easy enough anyone can enjoy the process. What better way to lift your spirit than creating something you can actually use in your own home! Awesome!
Hi, Melissa! Thank you so much for the kind words! I’m really grateful for Vidya introducing me to some really great people!
Exactly, Melissa! That’s the thing I adore about DIY – such a sense of pride. So glad Cher’s here today with her beautiful guide!
Looks like a fun project, VIdya. I love the bird knobs that Cher used. Thanks for sharing! “)
Thank you, Cathy! I bought them at my local Hobby Lobby. I really love those knobs, too!
Oh yes, Cathy – aren’t the bird knobs adorable! 🙂 Thank you for being here!
I’m a little wary of the drilling. But i will check out Cher’s blog.. sounds like an interesting place. thanks Vidya.
Hello! I used to be wary of drilling, also, but you can do it and I am here to help!
Tulika, just hold the drill once…and you’ll be hooked. Go for the easy home-use type. You’ll find yourself looking for excuses to use it. Just like the first time we used scissors 😀
Thanks for dropping by!
I see my aprons hanging from it…thanks, what a great idea.
Hi, Linda! That would be great for aprons or even a clipboard with your fabulous recipes!!
Linda, I can only visualize how pretty your knob rack will look like – with your lovely recipes, aprons, gloves… 😀
This looks fun and sounds easy to do! I can’t wait to give it a try!
Hi, Jessica! It really is an easy project – if you need help, let me know!
Oh Jessica, you must. And I hope you’ll show pictures! Hugs!
Very clever. I never would’ve thought to do this. Thank you, ladies, for the great idea. These little touches go far to make the day brighter.
xoRobyn
Hi, Robyn! Thank you so much for stopping by Vidya’s site! I really enjoyed being her guest!
🙂 DIY hacks are the best DIYs, Robyn! 😀 Glad you liked it. That Cher is a magician!
Am in love with those little birds. Cher always manages to make things look so easy – wish it came more naturally to me. I never knew you were such a good DIYer Vidya!!! Thank you for sharing Cher with us.
Thank you, Elle! I appreciate the kind words! A special thank you to Vidya, too, for the invitation!
Love to play, Elle! And yes, those birds are so darling! :-)Hoping to snag Cher again for another DIY project! 😀 And so happy you are here!
Thank you very much, everyone, for the kind words! I was thrilled by the invitation from Vidya – she is really awesome and I really love visiting her site. Thank you so much for the warm welcome!
I think this is the right moment to sneak in a second request :P, eh, Cher? But seriously, would love to have you here again! Thank you!
This is great Vidya! I need to try to do this.
🙂 I hope you do, Remy. It is fun and easy. Do check out Cher’s blog for more fabulous DIY projects – i absolutely adore her site!
Ok, I am awful at DIY in general. But this seems pretty easy to do 🙂 Thanks for the share Vidya
🙂 Thanks for stopping by, Sid. I loved having Cher over with her lovely DIY project and yes, I am working on it 😀
Interesting..I love collecting old stuff in the hope that I can do a DIY but never gotten to do it
PhenoMenon
Cher you always have awesome projects. I want to make the coffee table one so I can 1. have that beautiful piece in our family room and 2. post pics of it all over Facebook to show my cousin, who is also a woodworker by trade for some fancy-schmancy place in the city, that mine is way more beautiful than his. 😀 absolutely love this rack. unfortunately we live in an apartment where nails don’t stay in the walls. I’ve patched the wall twice afraid that the landlady will notice. any insight on how i can get all these school pictures on the wall besides taping them up ghetto-style?
Hi Vidya,
First time on your blog and thank you for introducing me to Cher. What a lovely blog post and the results look beautiful.
Can’t wait to have a go at this 🙂
Beth
Welcome, Beth! I am in love with Cher’s blog! And yes, her tutorials are great. Would love to see how your project turns out!
By the way – love your newsletters! Yes, I am a lurker!
Are you participating in the April AtoZChallenge?
The soda can tab idea is brilliant! I never thought of that!
Yep, Stacy, I thought it was a superb – and such an easy trick! 😀 Thank you for coming by!